
Wall decals may be applied to hard, clean, smooth and dry surfaces. Some textured walls may not work well. Our wall decals are removable but not reusable! Please use caution when removing wall decals. Depending on the age or condition of the painted surface underneath, some touch ups may be necessary.
For wall decal installation:
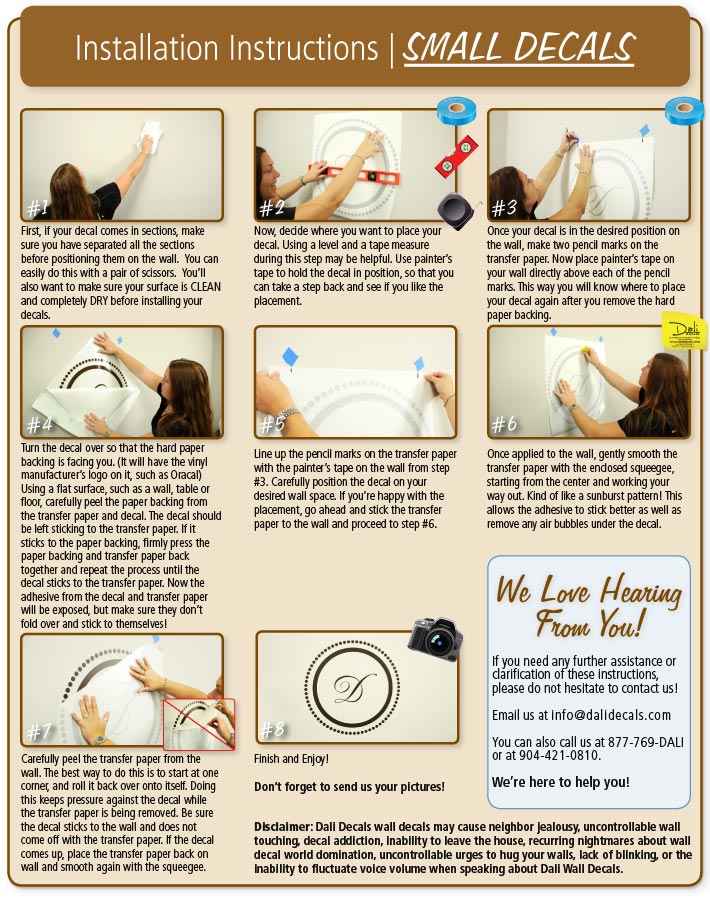
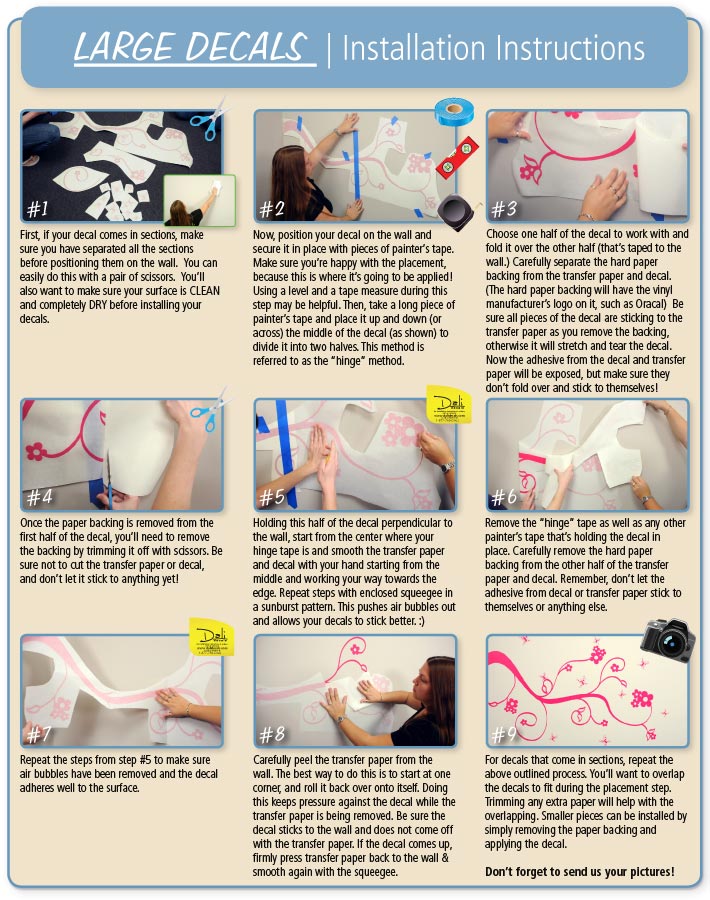
Figure out where you would like your decal(s) placed. Make markings and measurements as needed. Also, be sure your surface is clean and REALLY REALLY dry (if applying to drywall). If your drywall surface is damp or dirty, make sure you wipe it down completely with a dry paper towel or rag before application.
**If your surface is wet or damp in any way, your decals will NOT stick.**
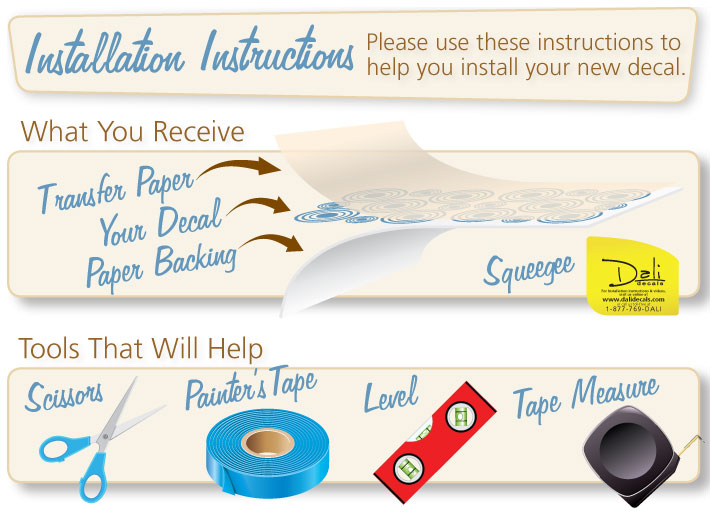
Now, take hold of your decal. You will notice there are three layers. The transfer paper (which looks like white masking tape), the decal itself (no clear material!), and the paper backing to the decal. (the paper backing will also have the vinyl manufacturer's logo displayed, usually Avery or Oracal).
Gently peel the hard paper backing away from the transfer paper. While you're doing this, the decal should be left sticking to the transfer paper. The adhesive side of both the transfer paper AND your decal will be exposed.
Now, place your decal on the wall with the transfer paper, (sticky side on the wall) and make sure it's where you want it. Take a credit card or some other type of thin, hard plastic, and gently smooth out the surface starting from the middle and moving outward. This will allow the adhesive to stick better, as well as remove any air bubbles in your decal.
Once you have smoothed out your decal, it is safe to remove the transfer paper. Just start at one corner and peel away slowly and close to the surface, making sure your decal doesn't peel up with it. If you notice more air bubbles, gently smooth out the decal again once you have removed the transfer paper. and VOILA! All done! :)
If you are applying to a glass, metal, or plastic surface:
Make sure your surface is clean and free of any debris or obstructions. Take a mild mixture of soap and water in a spray bottle and completely soak the surface where you want to apply your decal.
Now, follow the above steps to peeling away the paper backing. Once the paper backing has been peeled away, take your water mixture and SOAK the adhesive side of the decal and transfer paper. (This allows for corrections if placed incorrectly). Soak the surface where your decal is to be applied again and line up where you want your decal.
Gently place your decal where you want it, with the adhesive side facing the surface. If there is an error in placement, the water mixture will allow you to move your decal around until the placement is correct.
Take your squeegee or some other type of thin, hard plastic, and gently smooth out the surface starting from the middle and moving outward. This will allow the adhesive to stick better, as well as remove any air bubbles in your decal. Make sure you smooth out any liquid or bubbles underneath the transfer paper. Once this is done, you cannot change the placement of the decal. Allow your decal to dry (with the transfer paper still on.)
Once you have smoothed out your decal and it has dried, it is safe to remove the transfer paper. Just start at one corner and peel away slowly and close to the surface, making sure your decal doesn't peel up with it. If the decal keeps peeling up with the transfer paper, smooth out the surface again (with the transfer paper still attached) and allow it to dry a little bit longer. If you notice more air bubbles, gently smooth out the decal again once you have removed the transfer paper. and VOILA! All done! :)